
As you probably noticed from our conference talks and trainings, we do a lot with Docker. Either to improve the build pipeline, have better artifacts or run complex microservice applications in Kubernetes. We often get asked from our session attendees and customers that all looks nice, but that they can’t use it since they still use the .NET full framework. This is absolutely not true. We can do a lot of things with Windows-based containers and even if your application cannot be shipped within a container, you still can benefit from containers in your CI pipelines. In this blog post, we will show you how you could use a Docker container as your build environment.
Using a Docker container as a build environment, has several advantages:
- A Docker container can be maintained easier.
- You have all your build tools in a single image (like a VM image, but a lot smaller).
- It is integrated into Azure Pipelines and you can easily reference the versioned container image from your YAML pipeline definition.
- With YAML pipelines container jobs, you have and end-to-end versioned CI environment.
How do I build my application in a Docker container - the basics
For people who are new to Docker, think of a Docker container as of a VM. All your operating system dependencies, runtimes and tools are installed in it. Compared with a VM, Docker is not virtualizing the hardware but we have a virtualized kernel. So we basically run the container on the already running kernel of the host operating system. The container therefore starts almost instantaneously and we achieve a higher density of containers compared to VMs on the same resources.
For this blog post we will use a simple “Hello World” application programmed with .NET 4.8. In order to build it, we need a container which has the corresponding .NET Framework SDK installed. Luckily, there is already a predefined image available provided by Microsoft: mcr.microsoft.com/dotnet/framework/sdk:4.8-windowsservercore-ltsc2019. With the container, we do what we normally do, just in a container:
- We get the sources
- We compile the solution
- We use the output as an artifact
Assuming you have Docker Desktop installed and switched to Windows Container mode, we can do the the following on the local command line:
- We want to start the mentioned Docker container and interactively execute the MSBUILD commands inside the container. The first thing we need to solve is how to get the source code into the container. We can easily achieve that by providing a volume mount argument which mounts my local directory (where the source code resides) into a defined folder inside the container.
- Please note that I’m executing this on a PowerShell console. So
${pwd}will provide the current working folder. My current working folder is not mapped into thec:\appfolder inside the container. - The last parameter defines the image that is used to build the container.
- Please note that I’m executing this on a PowerShell console. So
1
2
docker run -it --rm -v ${pwd}:c:/app mcr.microsoft.com/dotnet/framework/sdk:4.8-windowsservercore-ltsc2019
- Now we have an interactive shell inside the Docker container. We mapped the working folder and therefore we can simply start the MSBUILD command on the solution in the working folder.
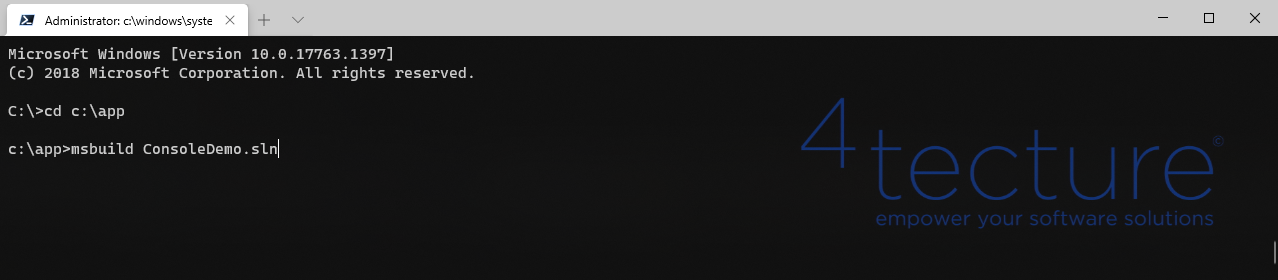
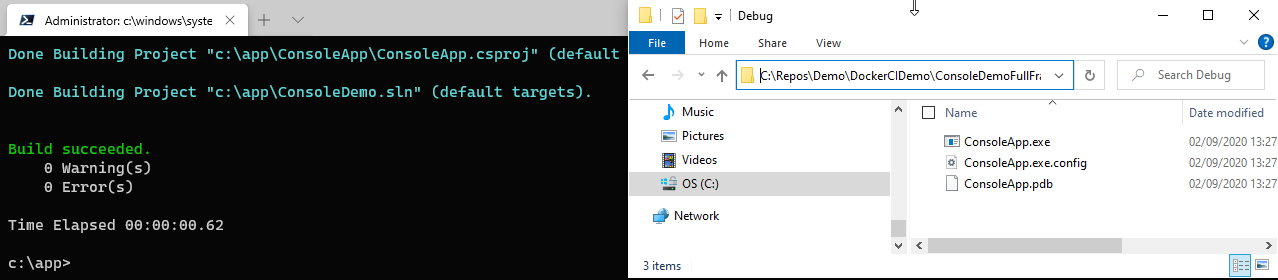
- After running the build, we see the compile output in our working directory.
How would a build agent use a CI environment in a container?
Running a build locally or interactively in a local container is a nice way to explain the concept, but actually local builds is not something we want to have in our DevOps process and pipelines. So how could we benefit from the container based build environment in an Azure Pipelines scenario? For sure, we could simply install the agent into the container and then run the agent commands inside this container. This is something we did in the past. It works well, but also has some drawbacks:
- We have a higher complexity to build the image since we also have to care about the agent installation.
- The containers have to be up and running to have available agents.
- Since the container keeps running, we still have a state of the last build inside the container. (Sure we could always delete the container and create a new one after the build, but as you see shortly, there is an easier way).
The actual goal should be to use the container just for build tools and not care about any dependency to a build agent. So basically we differentiate between running a build agent infrastructure and having specific build environments which have the tools installed to compile the source code. So if we normally run an automated build, the agent just executes task by task. What if we could execute the tasks inside the build container? So having the agent outside of the container and running the commands inside the container is the goal. Let’s do this on our command line to simulate what an agent would do.
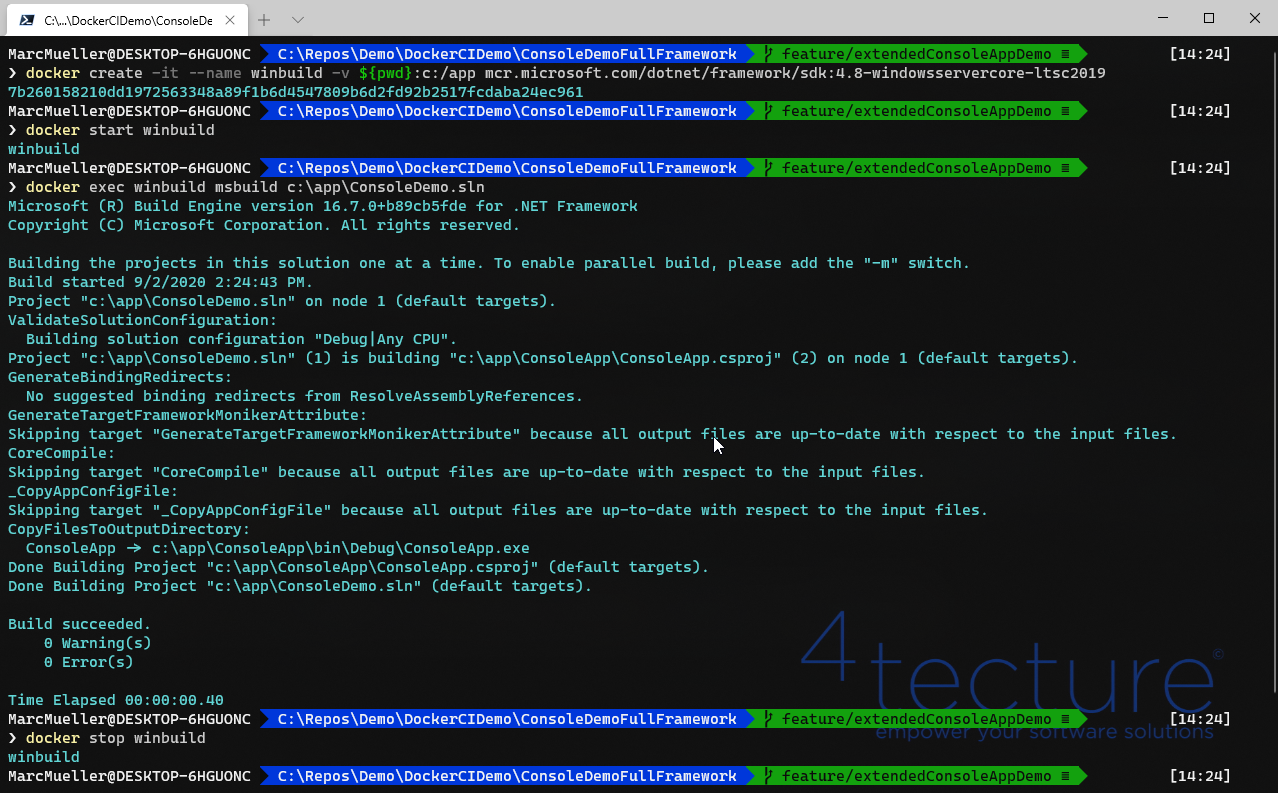
- Instead of starting an interactive session into a temporary container. We create the container with the workspace mapping and start it.
1
2
3
docker create -it --name winbuild -v ${pwd}:c:/app mcr.microsoft.com/dotnet/framework/sdk:4.8-windowsservercore-ltsc2019
docker start winbuild
- We now have a running container (we can reference it by the name ‘winbuild’) and now want to execute commands inside. (It is a simplified demo, but actually, each pipeline task would to an exec for its command)
1
2
docker exec winbuild msbuild c:\app\ConsoleDemo.sln
- At the end of the build, we stop the container and copy the generated artifacts
1
2
docker stop winbuild
Use the build environment container in Azure Pipelines
The process we demonstrated in the above chapters should now be applied to Azure Pipelines. Microsoft implemented a new feature called Container Jobs in YAML pipelines for Azure DevOps Services and Azure DevOps Server.
So how do we tell the build agent to create a container, execute it, map the source code into it then “docker exec” all the calls and remove it at the end of the build? Sounds pretty complicated but it is actually quite easy. Simply add a single line to your existing YAML pipeline and all the described container integration will happen automatically:
1
container: mcr.microsoft.com/dotnet/framework/sdk:4.7.2-windowsservercore-ltsc2019
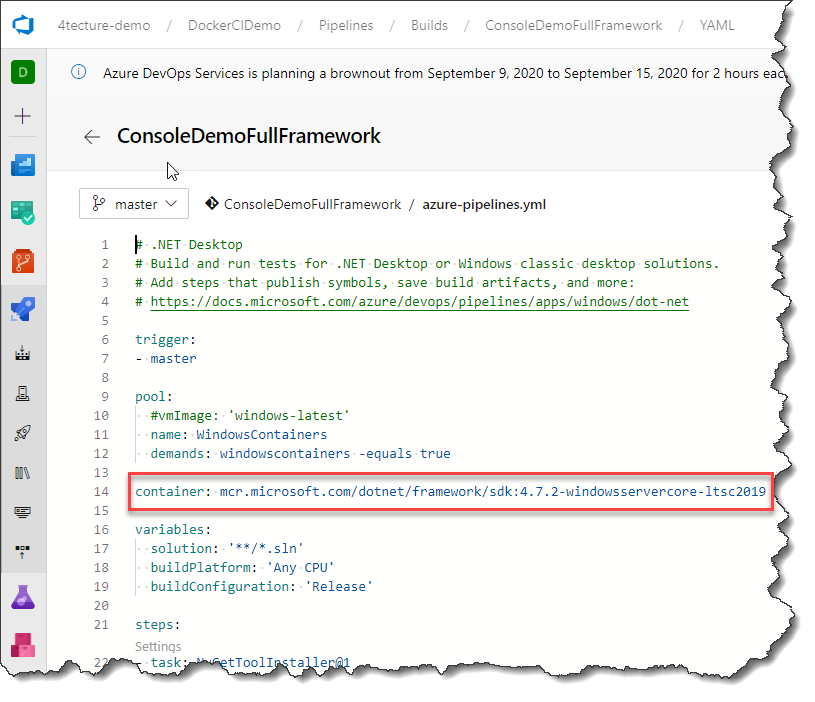
With this single line, we configure the whole job to run inside the specified container. We do not need to change any of the tasks, since the same tasks are just executed inside our container.
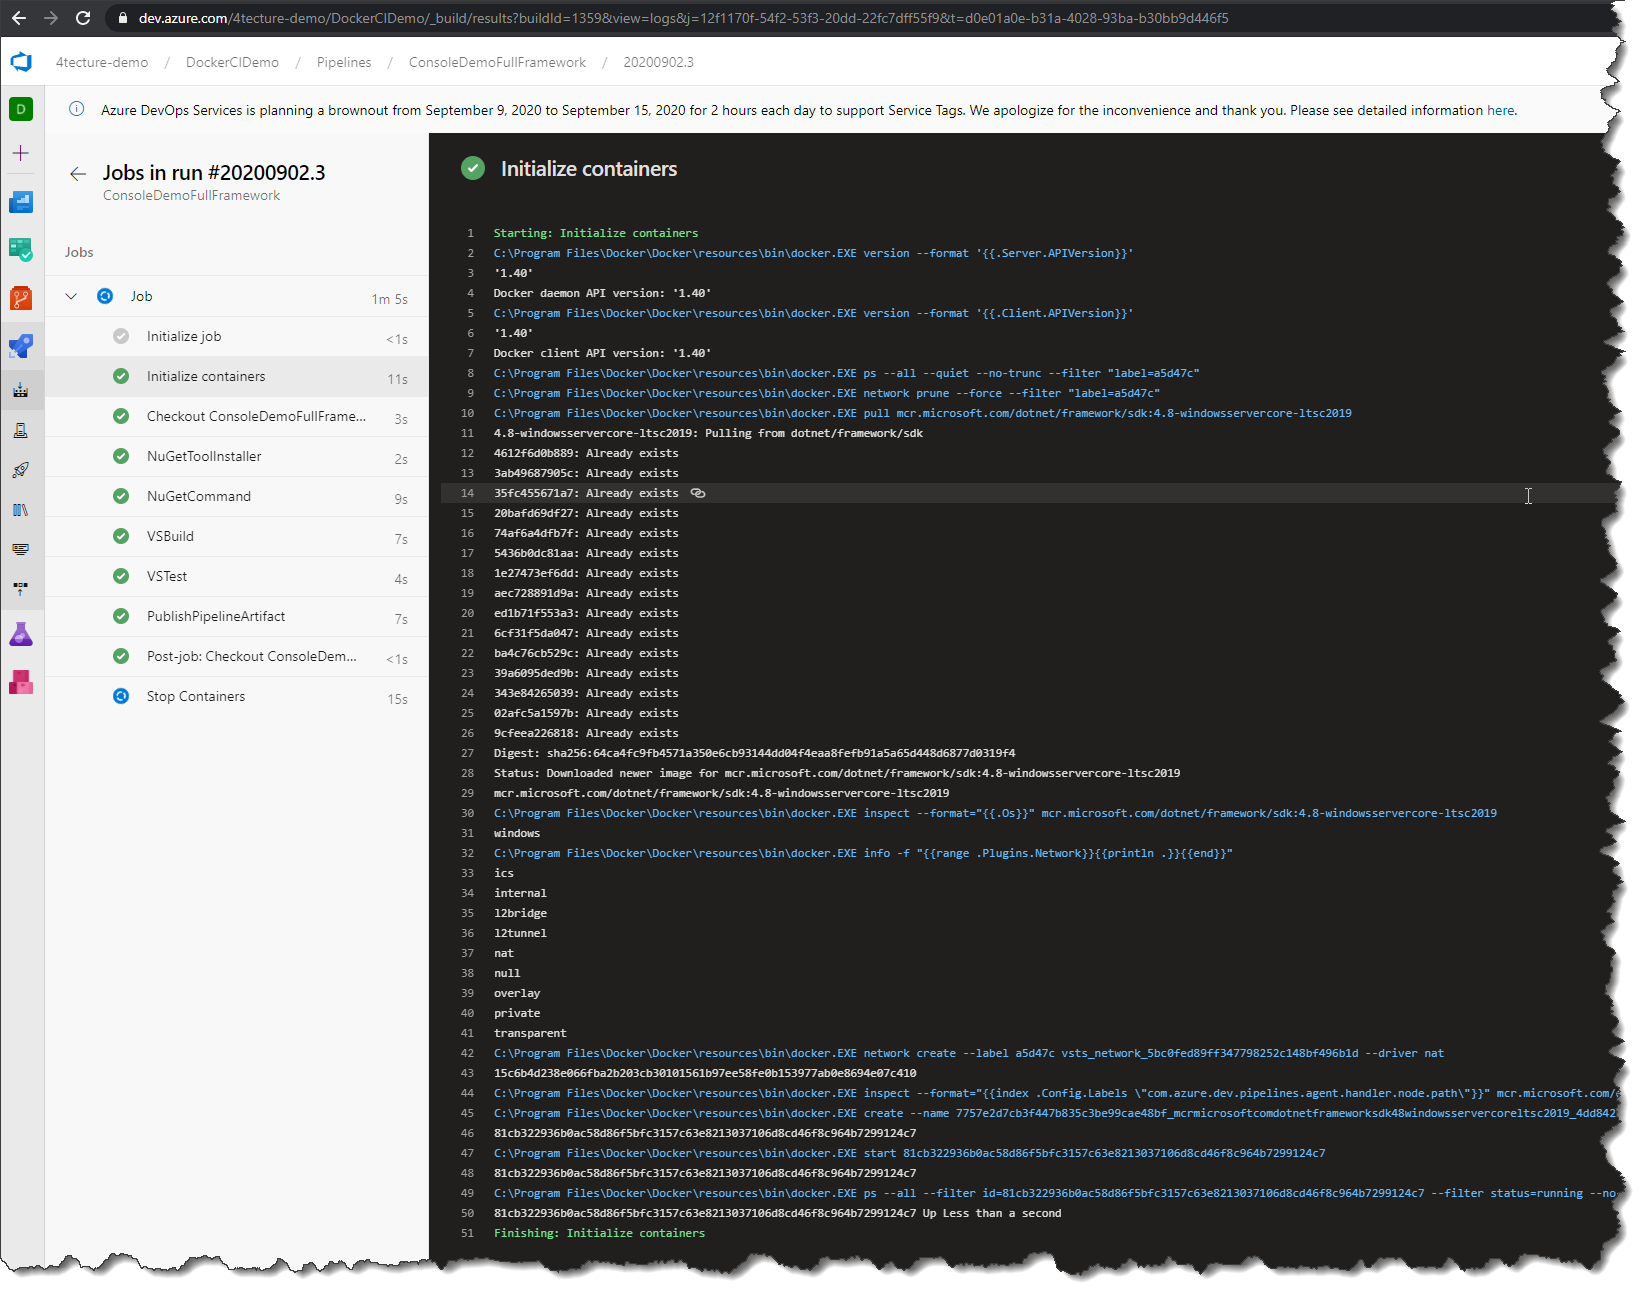
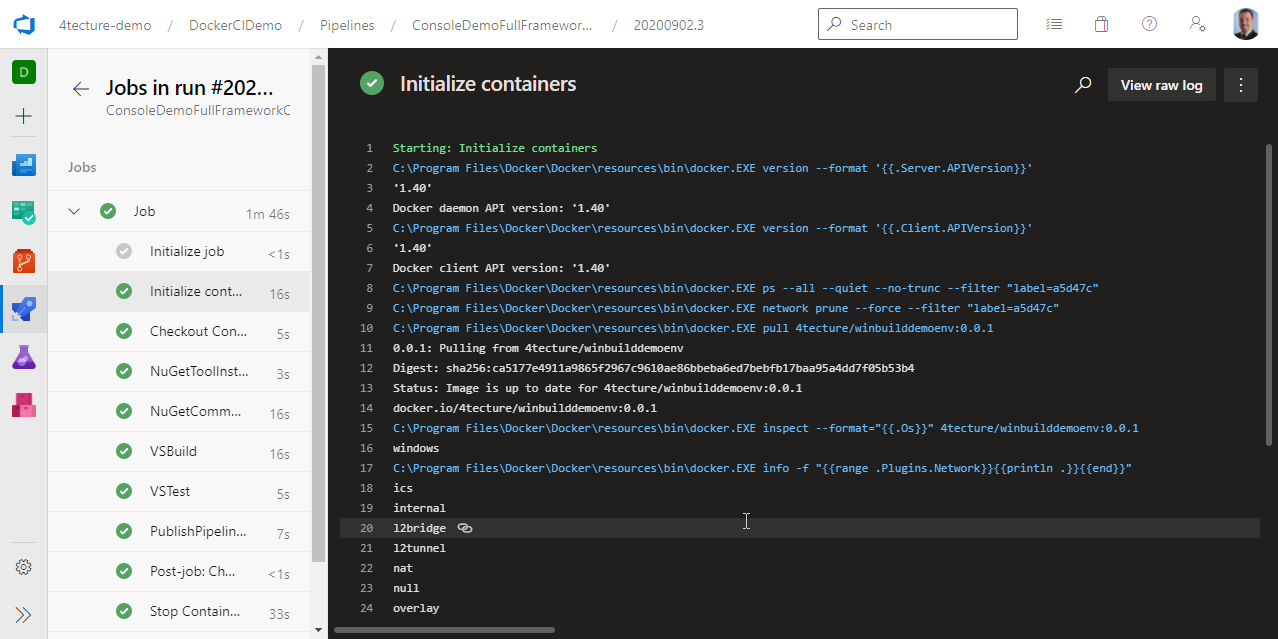
The main difference you will notice is an extra step in your build log called “Initialize containers”. Here you basically see what we did before on the command line. It create a new container and the agent will use this to execute the tasks. Of course, this is a little bit more advanced compared to our simple command line demo. It additionally maps tool paths to the container and sets up a dedicated Docker network for the build. All the advanced features of container jobs and service containers will be covered in a dedicated blog post in the near future.
How do I install custom tools in my build environment container?
The current sample is quite simple and usually we have to deal with custom tools and SDKs in our build environments. So how do we setup a custom container? If we need a custom container, we need to define a Dockerfile. The Dockerfile defines how a new container image is built. It usually depends on a base image, so we can benefit from another container which almost fits our needs and add our custom tools to it.
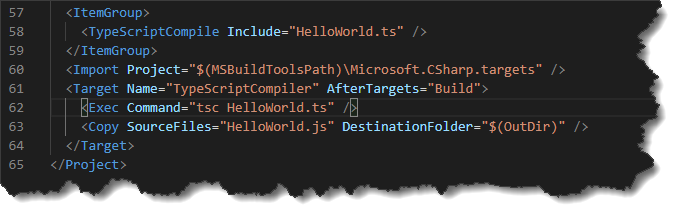
Let’s extend our example and think of our simple command line application to also require Node.js and a TypeScript compiler to actually work. To simulate this, I extended the csproj accordingly:
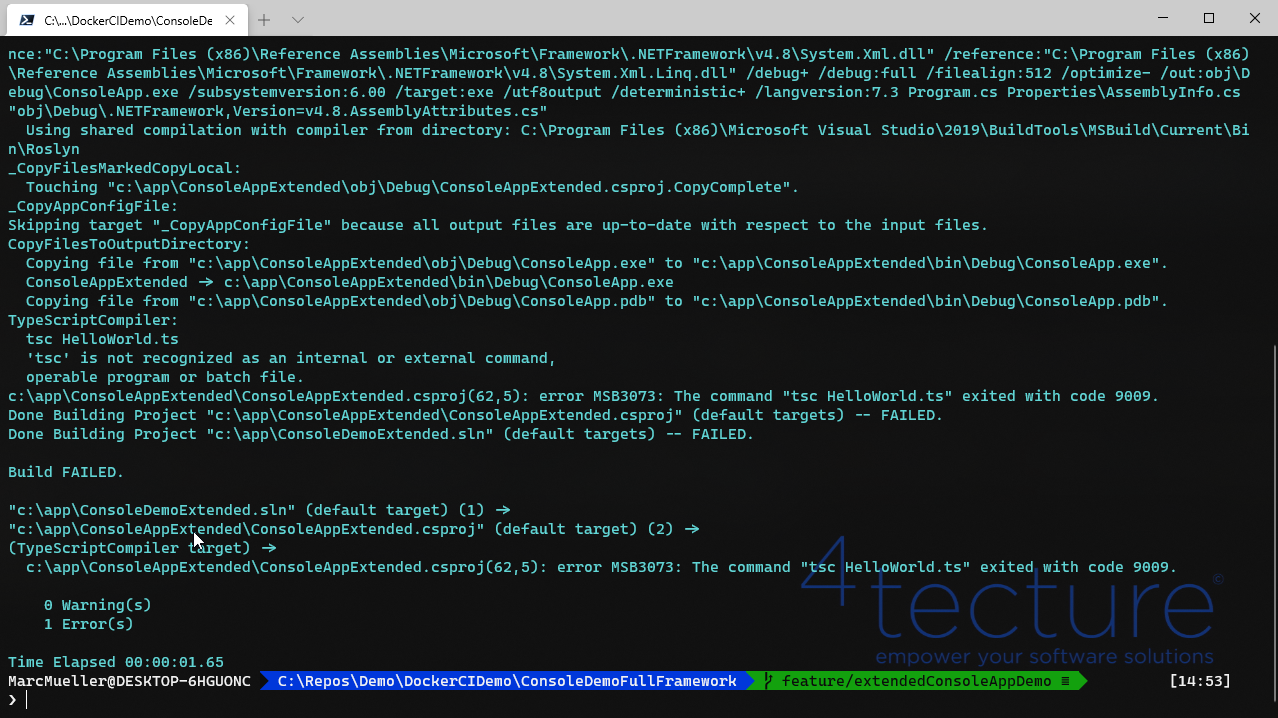
Running the same commands with the new project will result in a build error since NodeJs and TypeScript are missing:
We now need to create a custom image by defining a Dockerfile and build the image. The Dockerfile will look like this:
1
2
3
4
5
6
7
8
9
10
11
12
13
14
15
16
FROM mcr.microsoft.com/dotnet/framework/sdk:4.8-windowsservercore-ltsc2019

SHELL ["powershell", "-Command", "$ErrorActionPreference = 'Stop'; $ProgressPreference = 'SilentlyContinue';"]

ENV NODE_VERSION 14.8.0

RUN Invoke-WebRequest $('https://nodejs.org/dist/v{0}/node-v{0}-win-x64.zip' -f $env:NODE_VERSION) -OutFile 'node.zip' -UseBasicParsing ; \
    Expand-Archive node.zip -DestinationPath C:\ ; \
    Rename-Item -Path $('C:\node-v{0}-win-x64' -f $env:NODE_VERSION) -NewName 'C:\nodejs'; \
    Remove-Item -Force node.zip

RUN C:\nodejs\npm.cmd install -g typescript

USER ContainerAdministrator
RUN setx /M PATH $(${Env:PATH} + \"C:\nodejs\")
USER ContainerUser
We are using the image we used before as a base image. We then download Node.js, install the Typescript compile and extend the environment variable to include the “C:\nodejs” directory with all the needed tools.
We still do not have the image, yet. We need to call “docker build” to actually create the image for us:
1
docker build -t 4tecture/winbuilddemoenv .
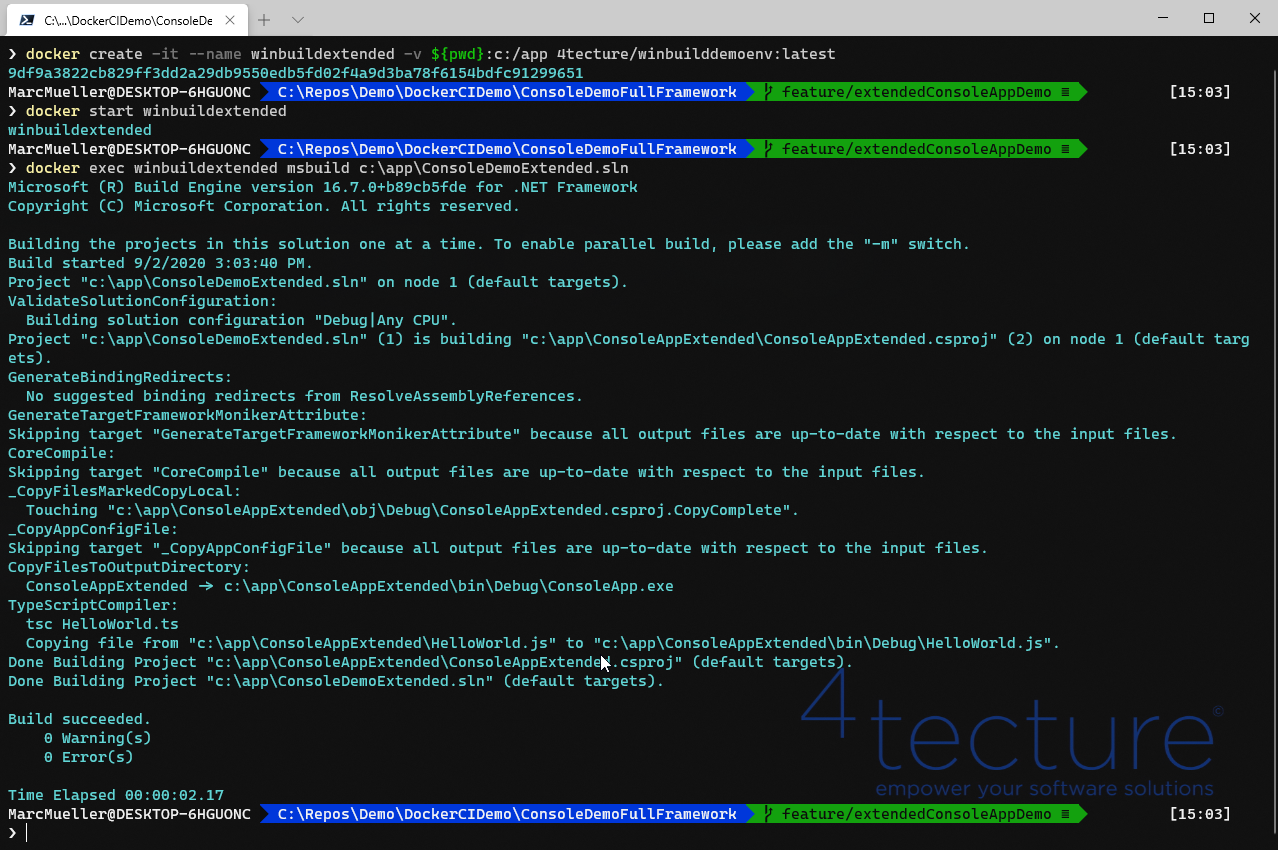
We are now able to execute the same demo with the new image:
1
2
3
docker create -it --name winbuildextended -v ${pwd}:c:/app 4tecture/winbuilddemoenv:latest
docker start winbuildextended
docker exec winbuild msbuild c:\app\ConsoleDemoExtended.sln
As you can see, the build is now succeeding.
Use your custom image inside Azure Pipelines
In order to use your custom build environment image inside an Azure Container Job, we need to publish the created image to a container registry which the agent can access. This can be a public registry or a private registry. For the latter case, we have to provide service credentials to Azure Pipelines in order to access the protected image. To keep it simple, we upload the image to the public Docker Hub by executing:
1
docker push 4tecture/winbuilddemoenv:0.0.1
We are now able to change the YAML definition to explicitly use this image:
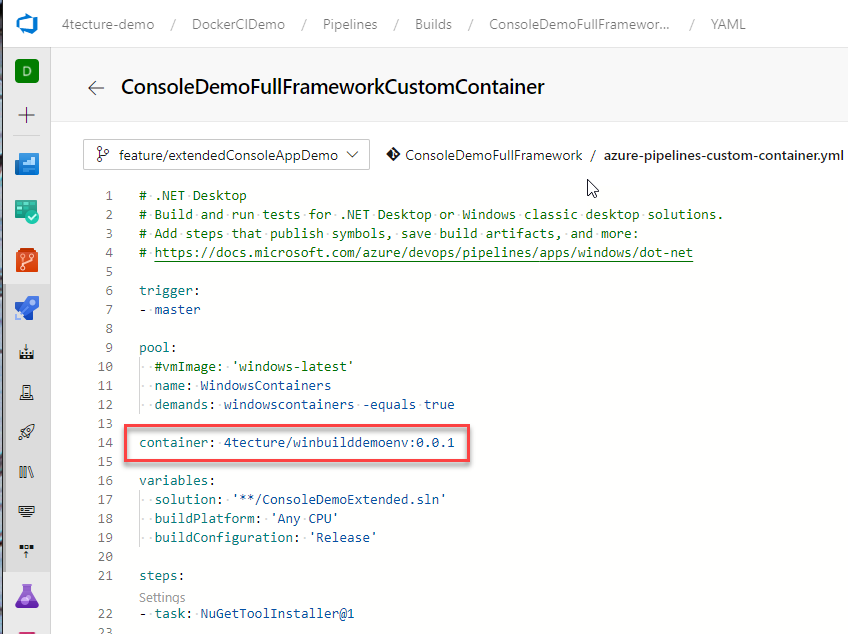
Finally, we achieved our goal: Our YAML pipeline is running inside our custom Windows-based container image with all the development tools installed into it.
Conclusion
Even if you need to use the .NET Framework to build Windows applications, you still can benefit from Docker by using the containers as your versioned and isolated build environments. If you are interested in more training or best practices about DevOps, Docker or CI/CD pipelines contact us at info@4tecture.ch.